Create and Assign Curriculum Templates AceyBrain
1. Purpose
This guideline provides step-by-step instructions to:
- Create Curriculum Templates
- Configure learning periods and topics
- Assign templates to students
2. Access System
-
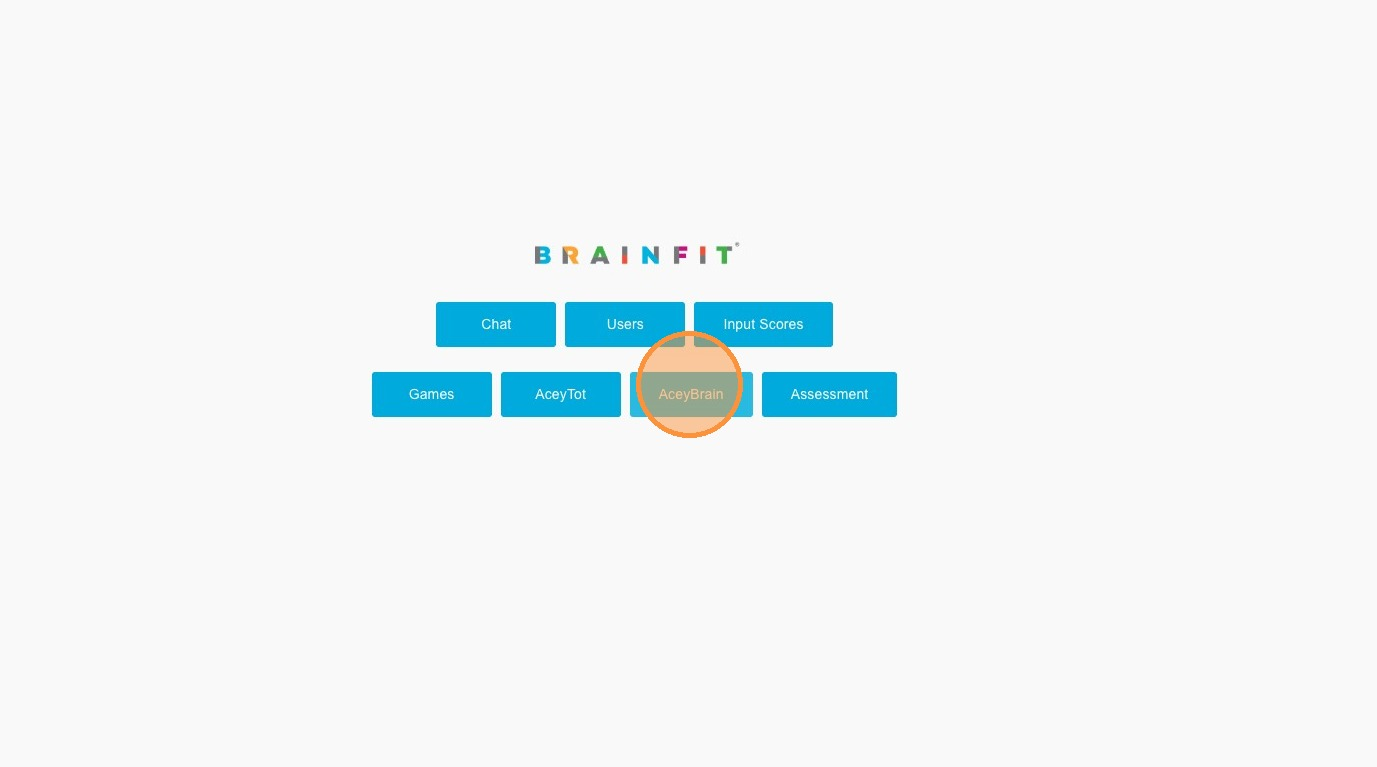
Navigate to the system: https://acp.brainfitstudio.com/acp/systems
-
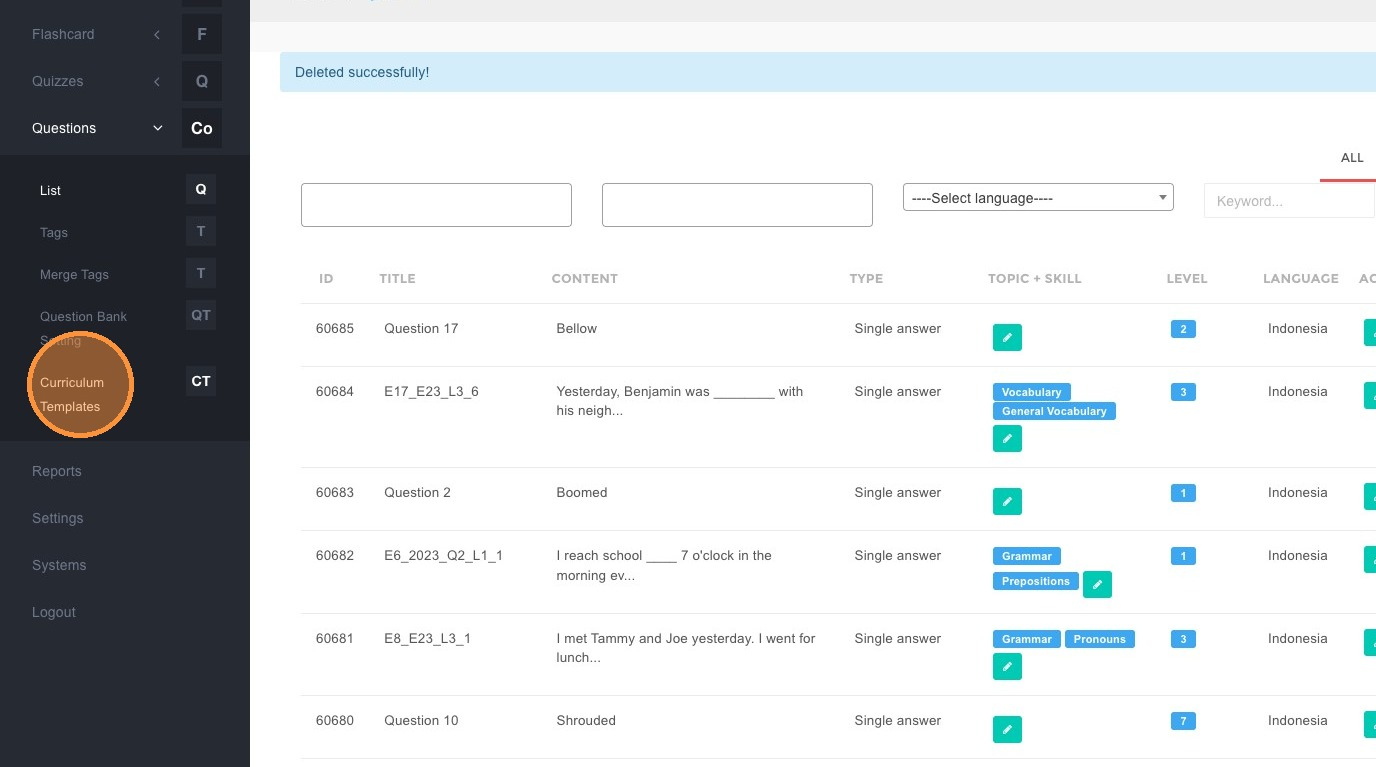
Go to:
- AceyBrain
- Curriculum Templates
3. Create a New Curriculum Template
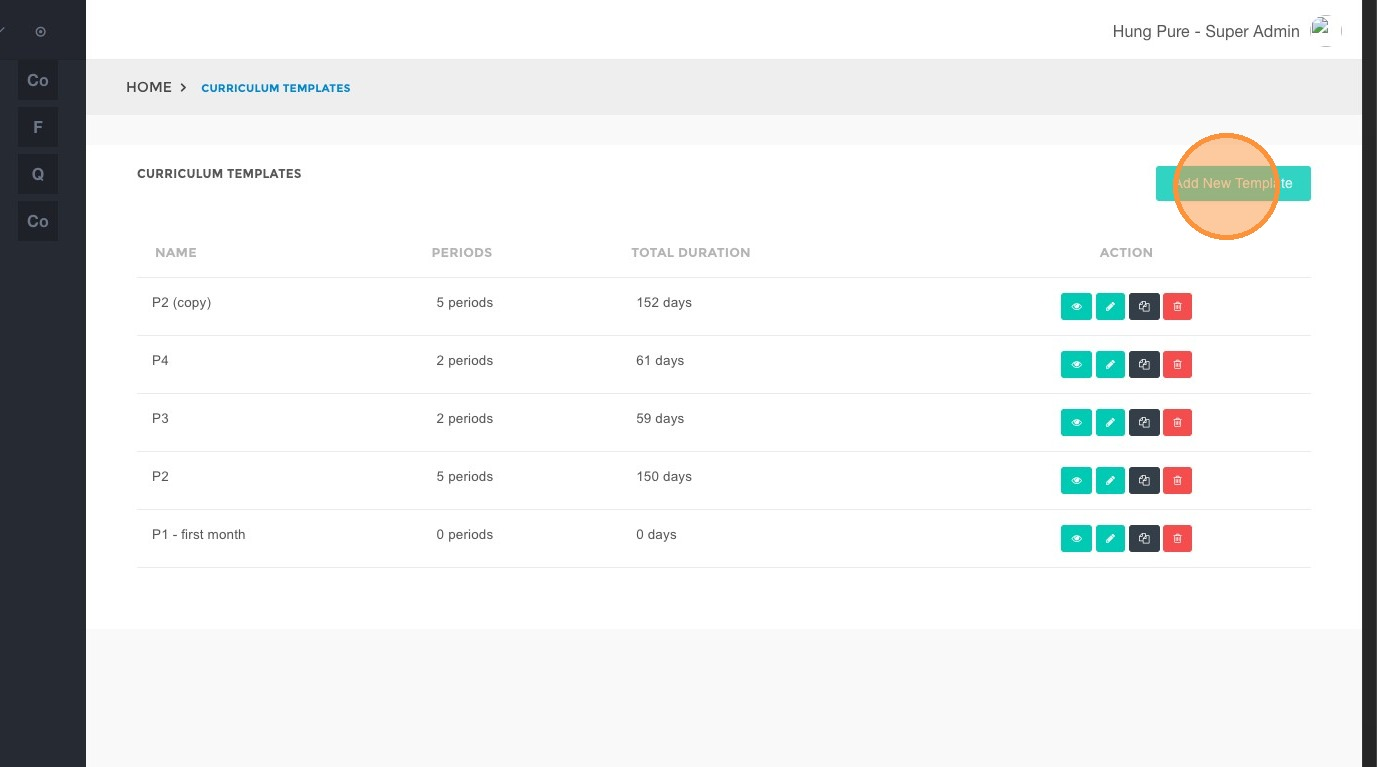
Step 1: Create Template
-
Click Add New Template
-
Enter template name (e.g.
P1 - First Month)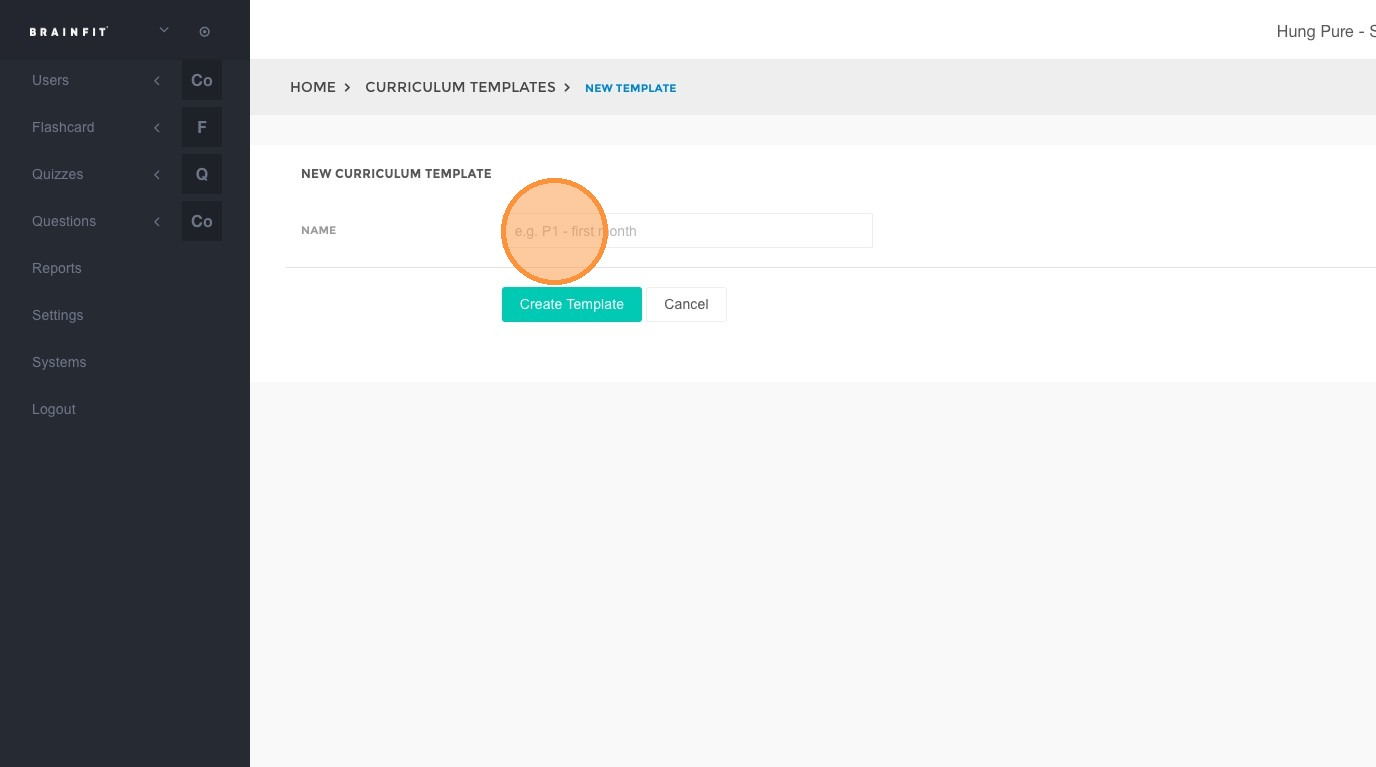
-
Click Submit
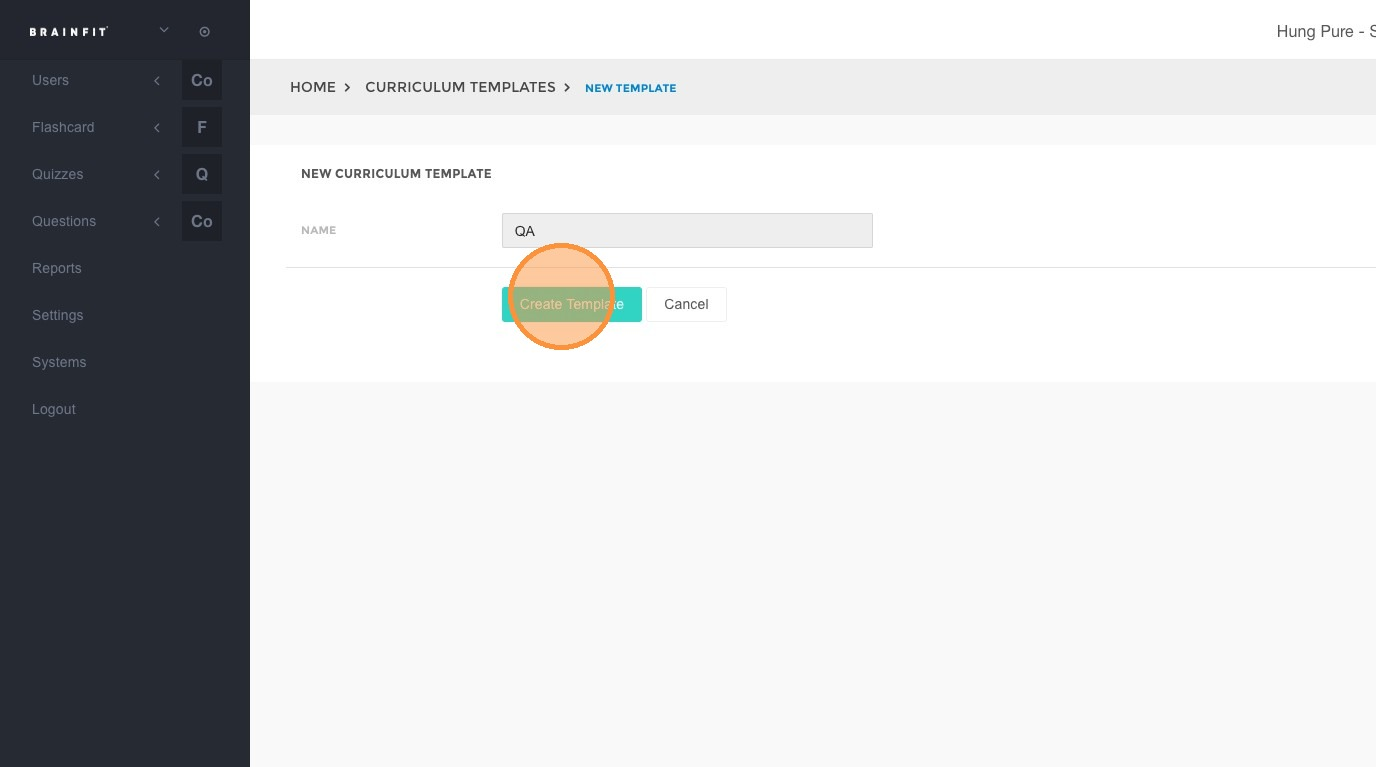
Step 2: Configure Duration & Add Learning Periods
-
Input Duration (days)
- Example:
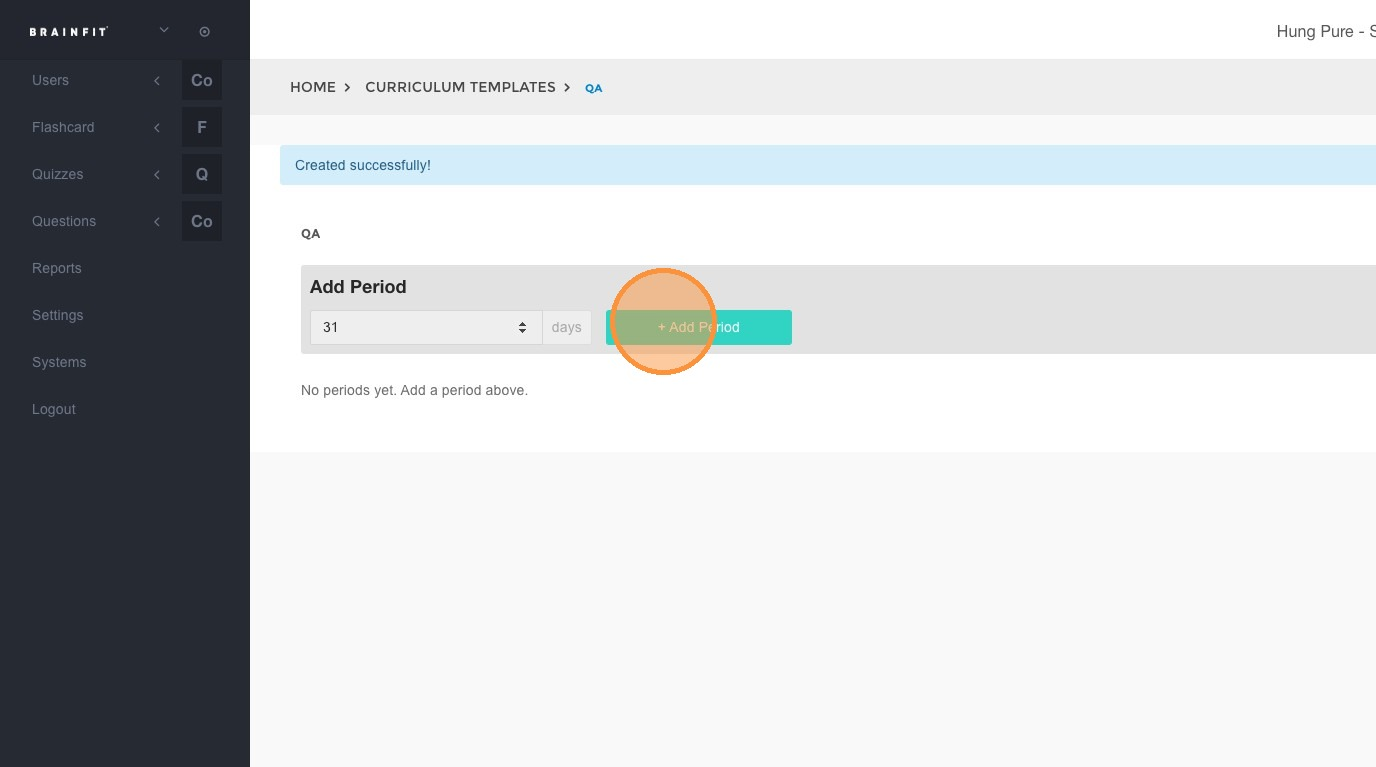
31
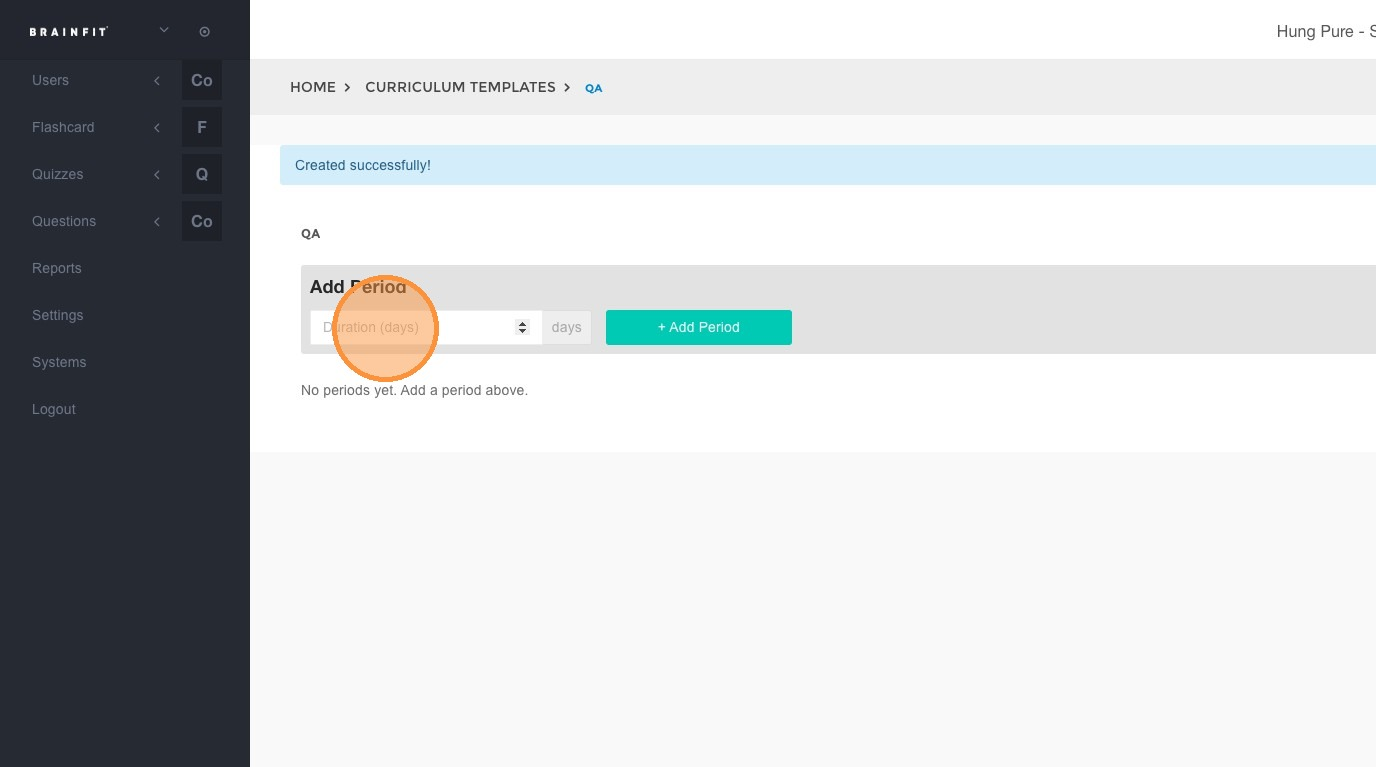
- Example:
-
Confirm the duration. Click + Add Period
-
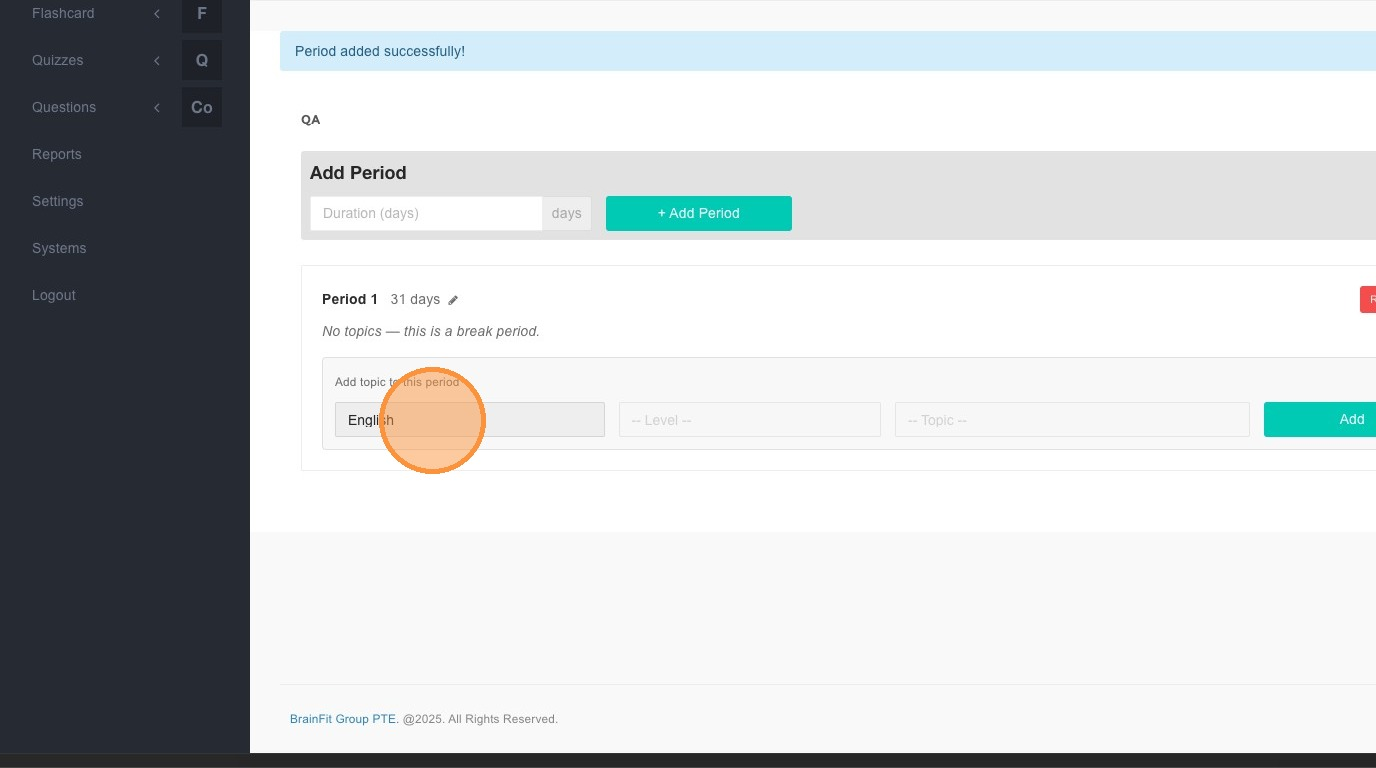
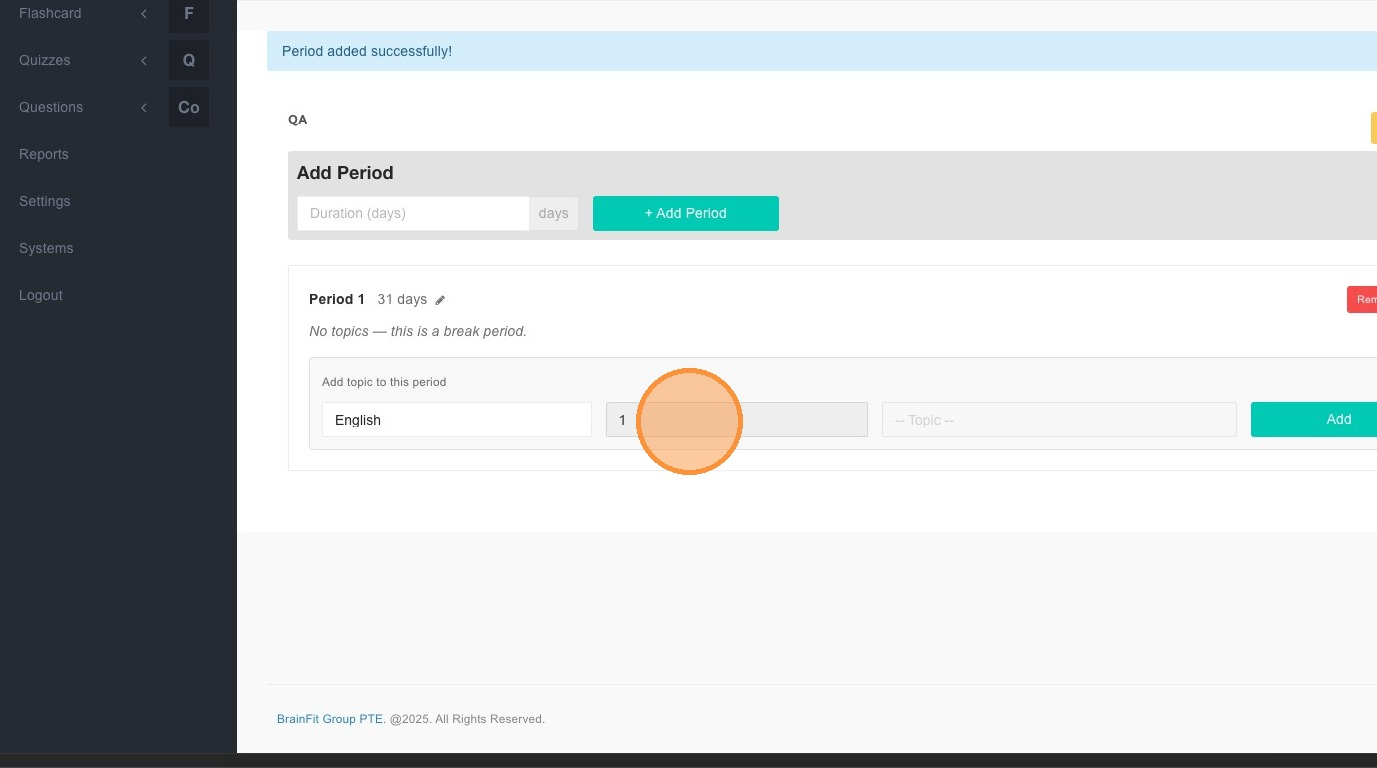
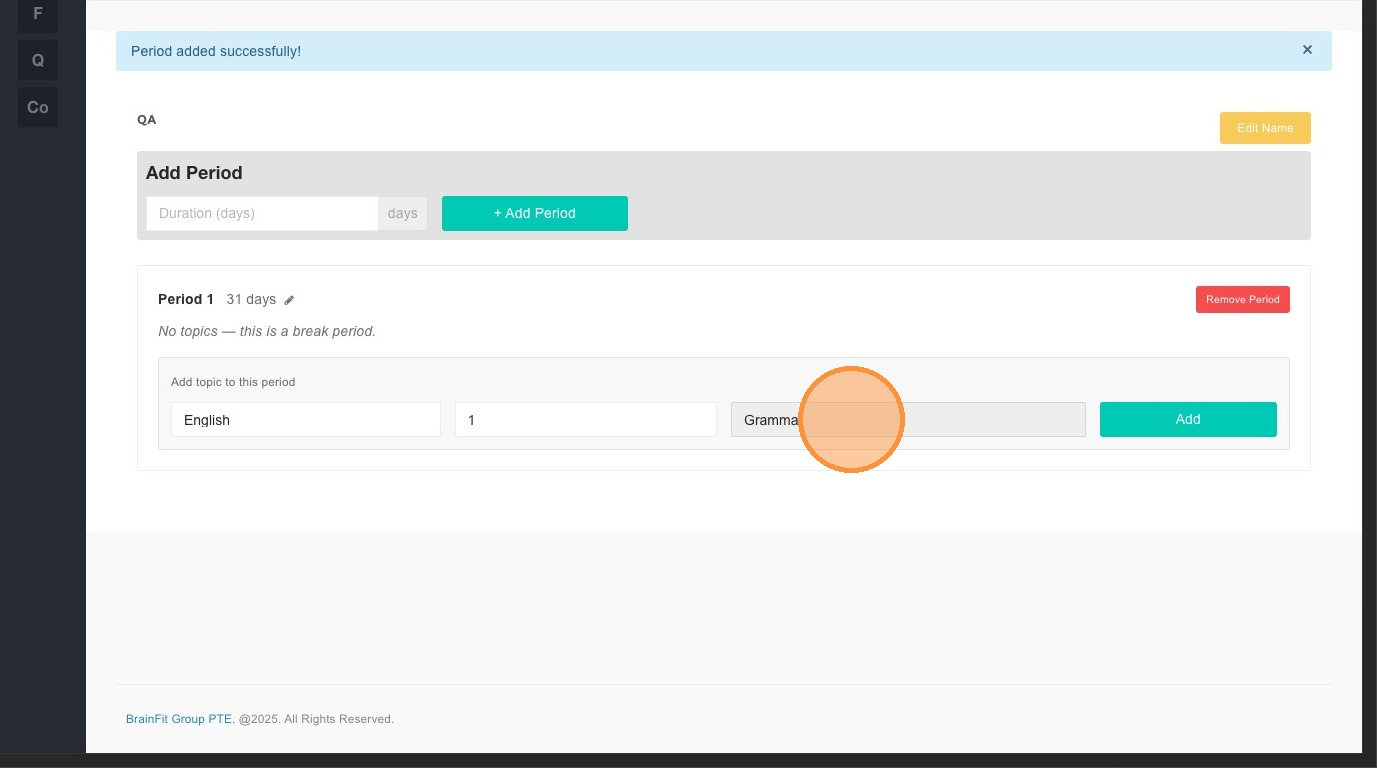
Configure:
- Subject
- Level
- Topic
💡 Tip:
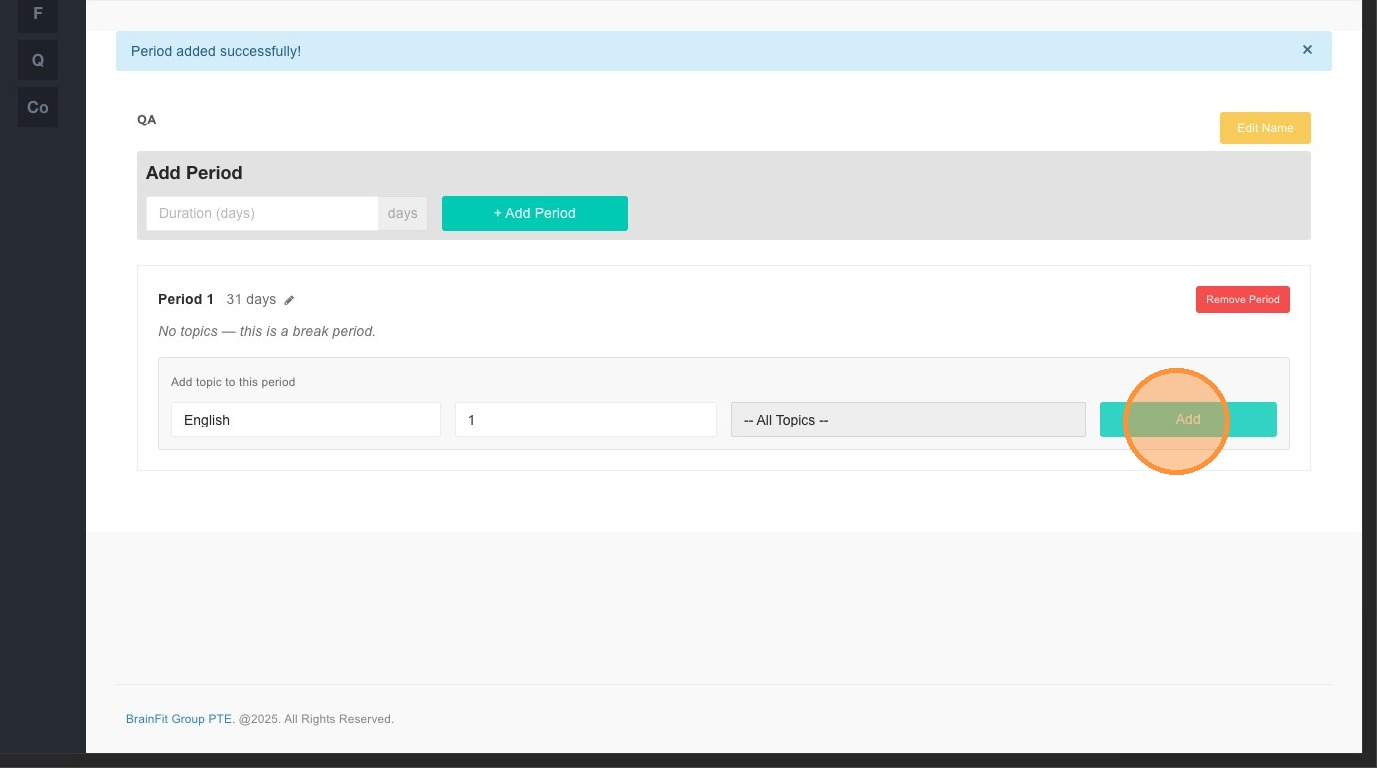
You can select "-- All Topics --" to assign all topics at once instead of adding them individually.
-
Click Add to save the period
Step 3: Adjust Number of Periods
-
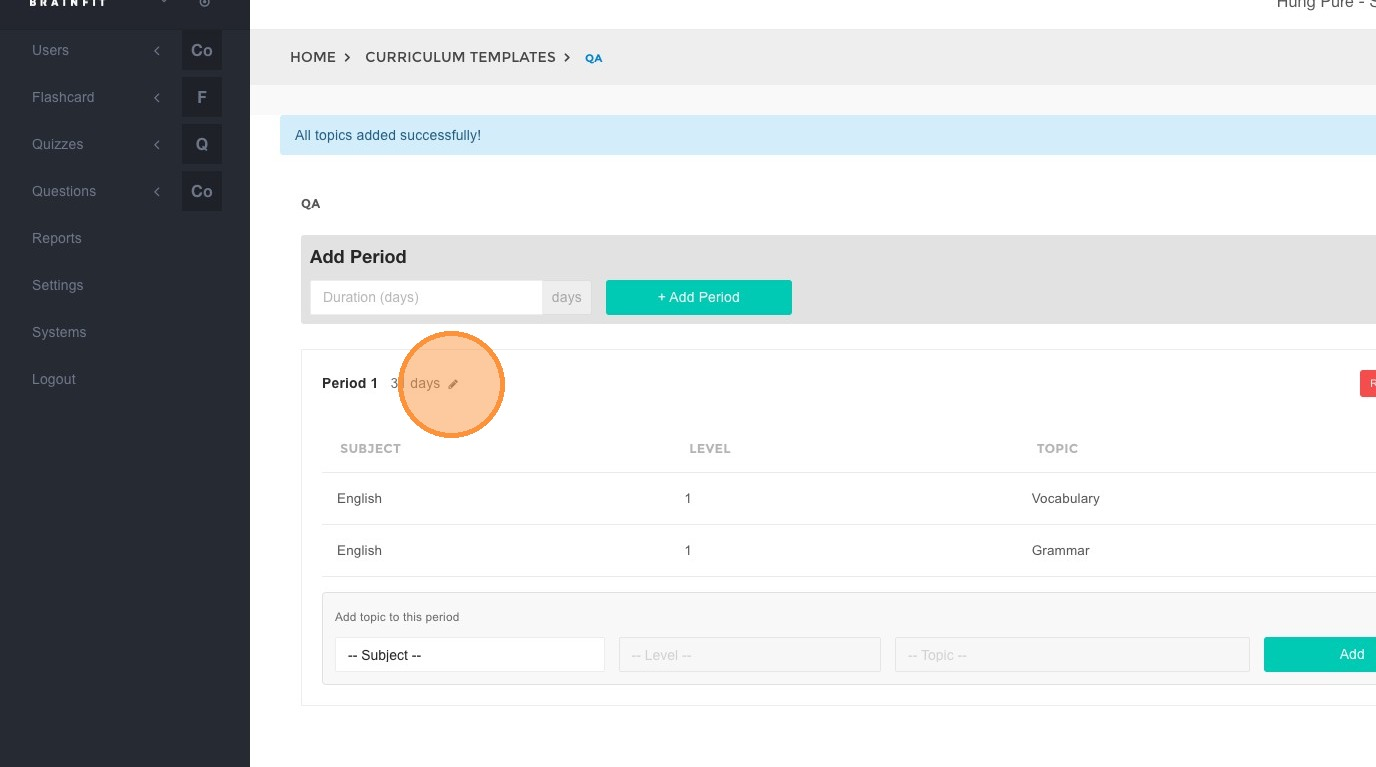
Locate the period configuration
-
Edit the number of periods
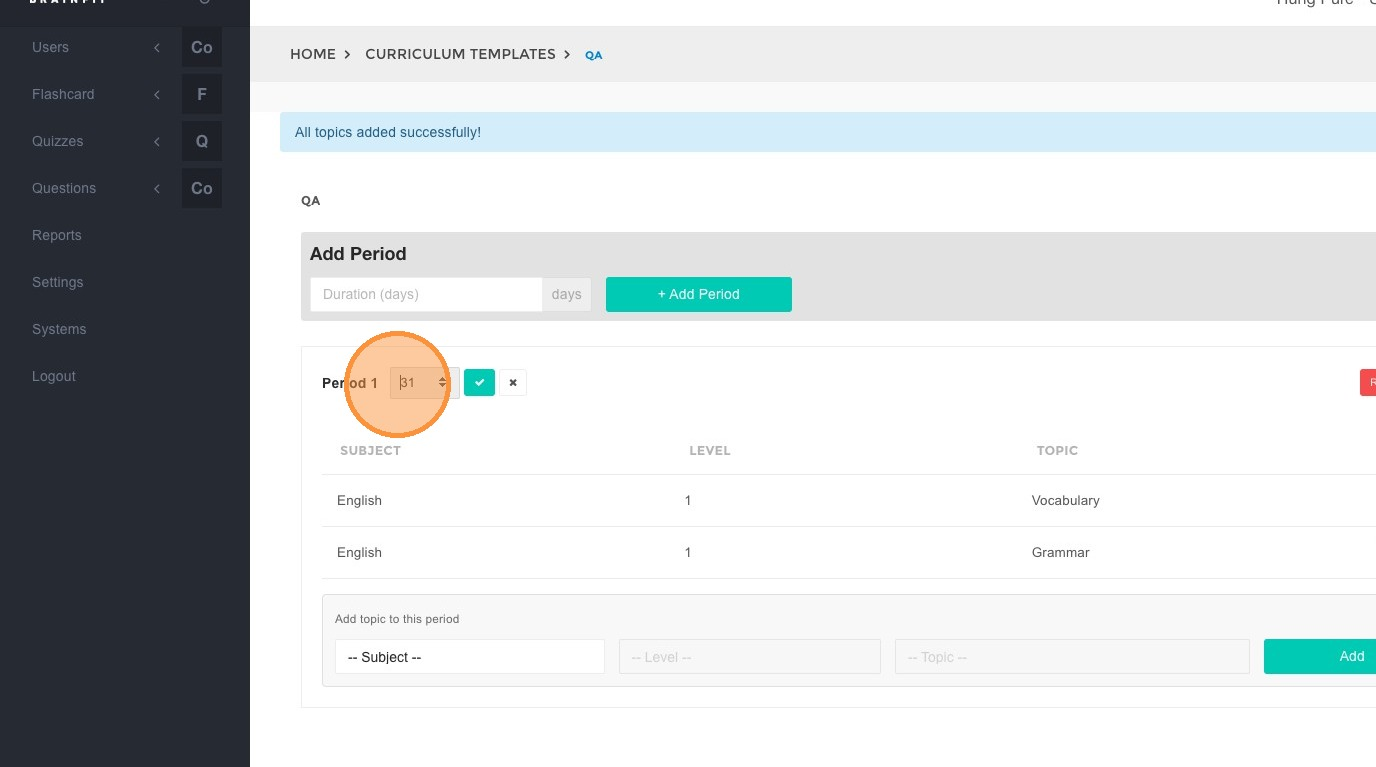
-
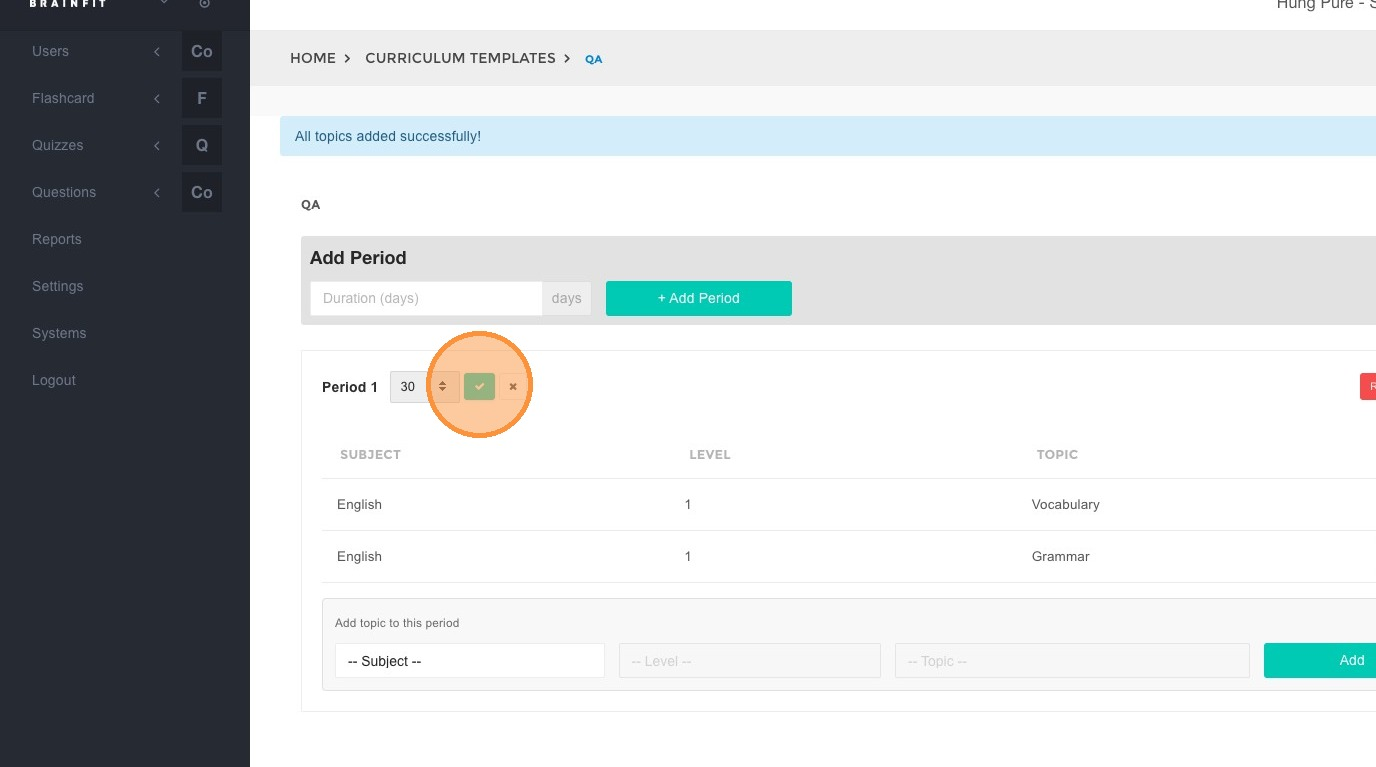
Update the value as needed
-
Click ✔ (Check icon) to confirm
4. Assign Curriculum to Student
Step 1: Navigate to Student List
- Select Student
- Select Student List
Step 2: Select Student
-
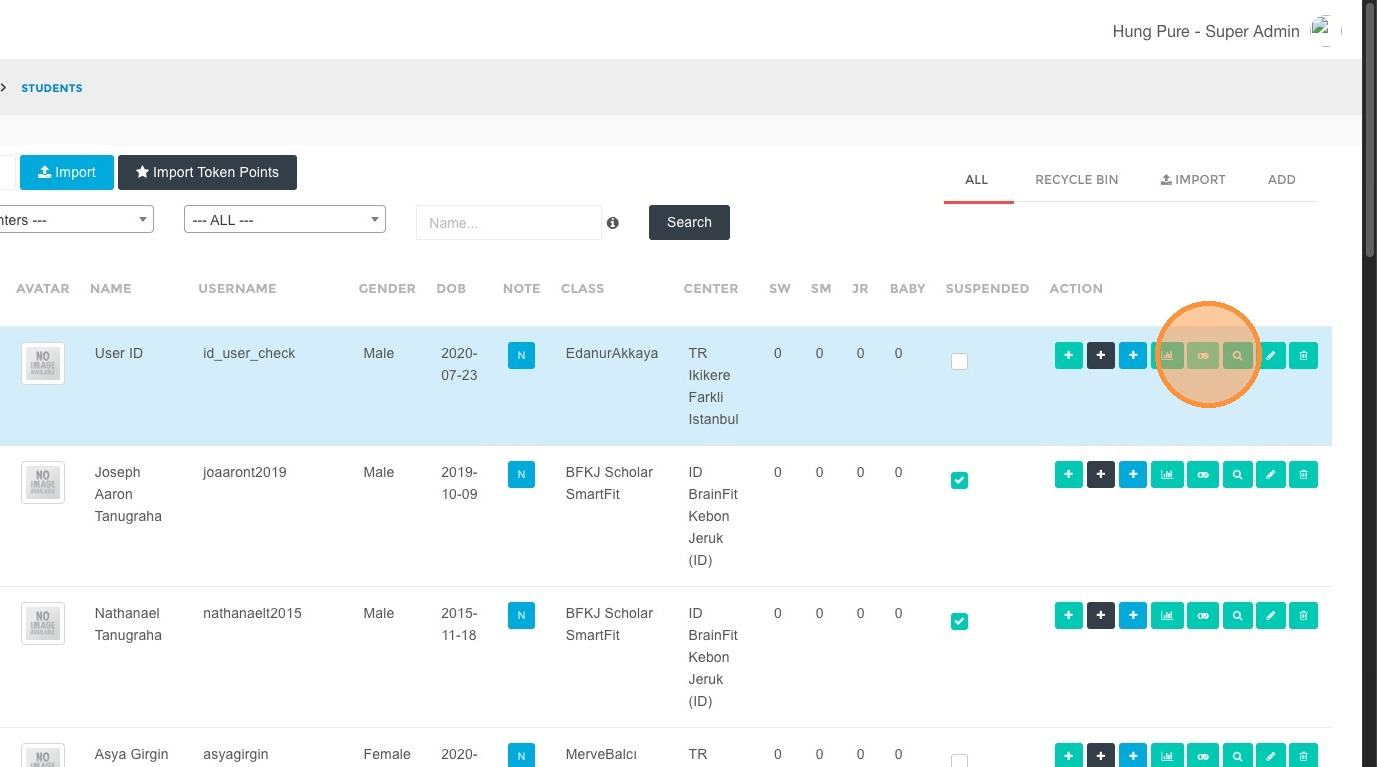
Find the student
-
Click Show Game
-
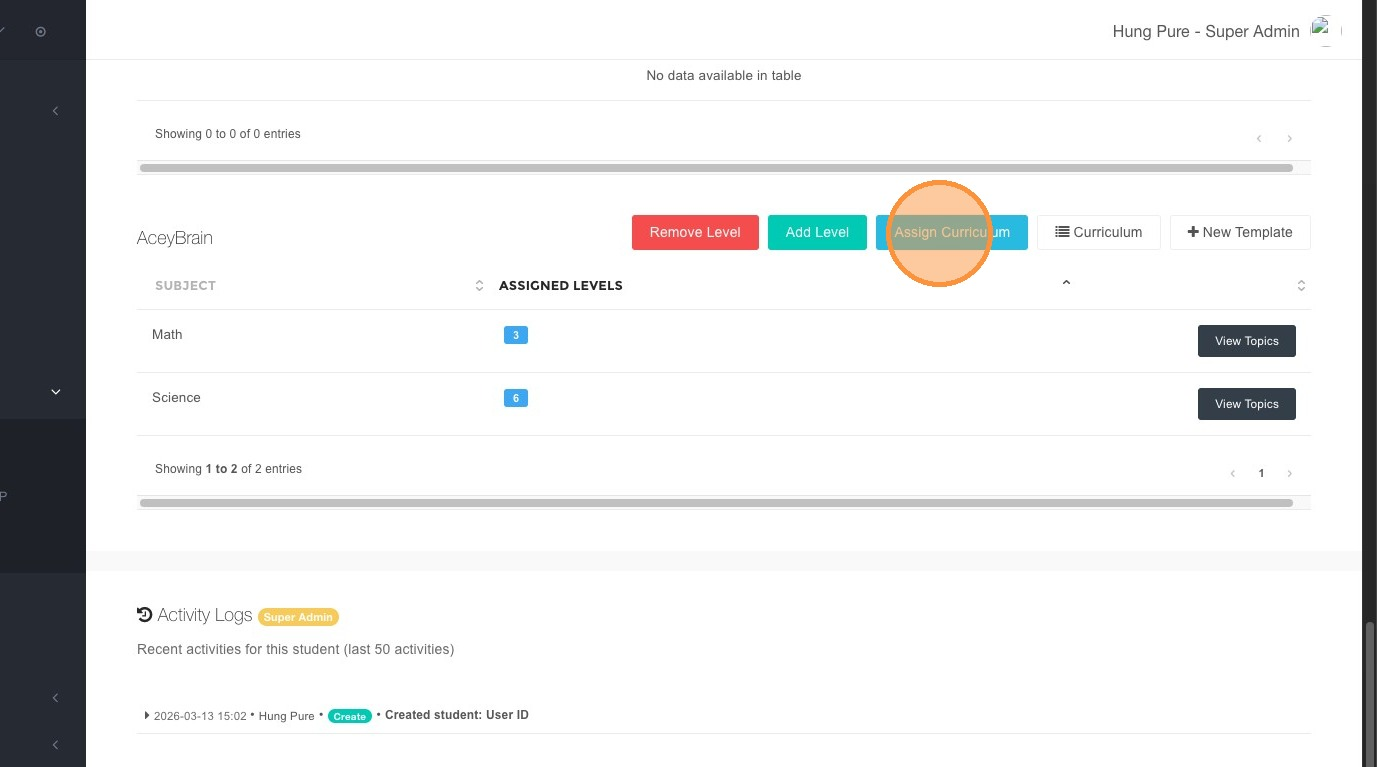
Click Assign Curriculum
Step 3: Assign Template
-
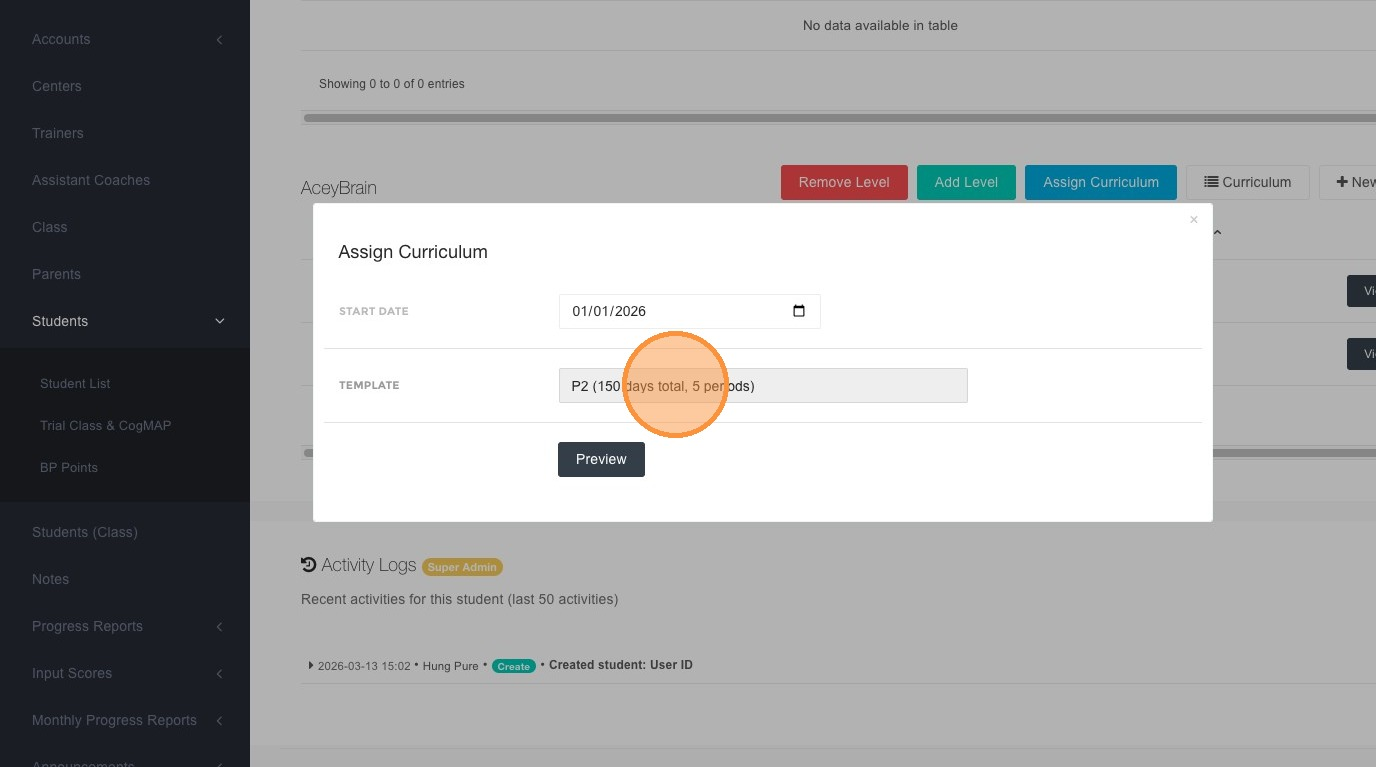
Select:
- Start Date
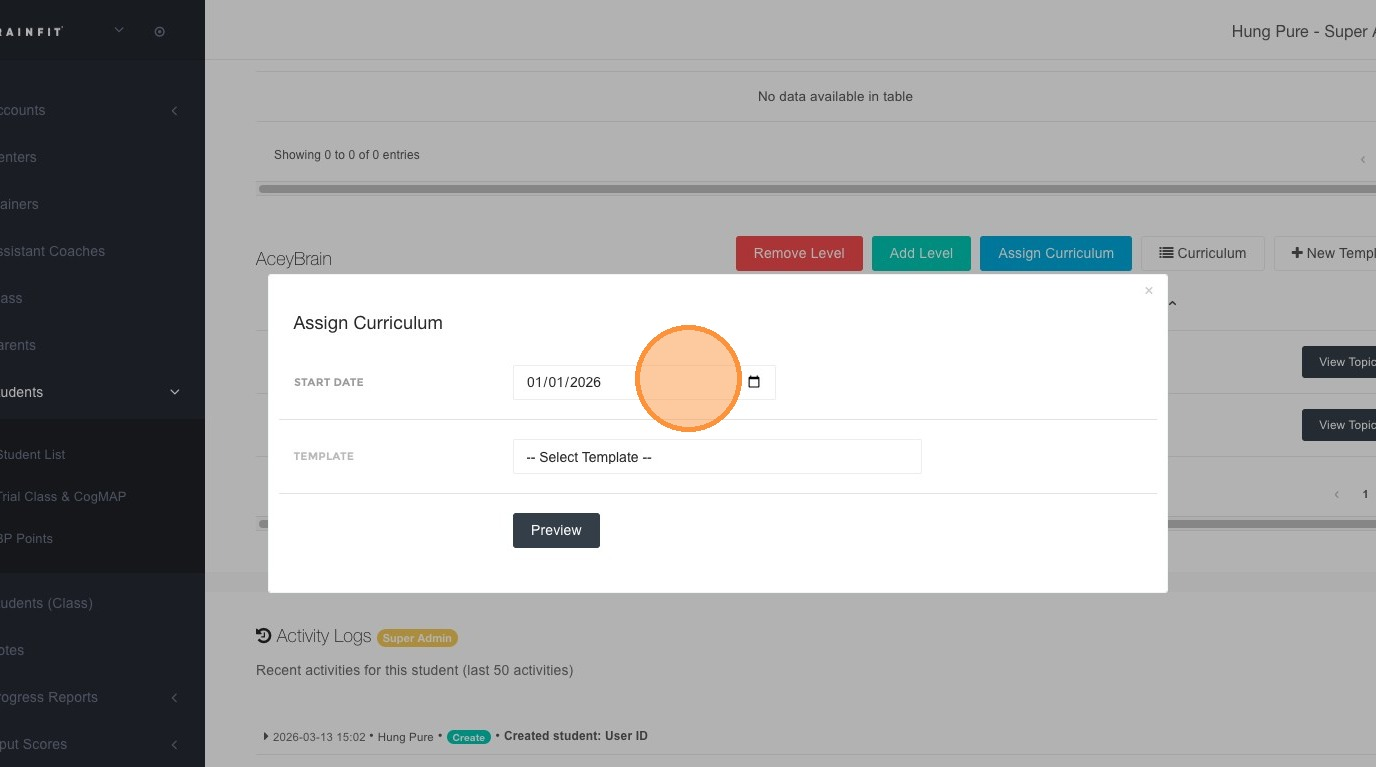
- Curriculum Template
-
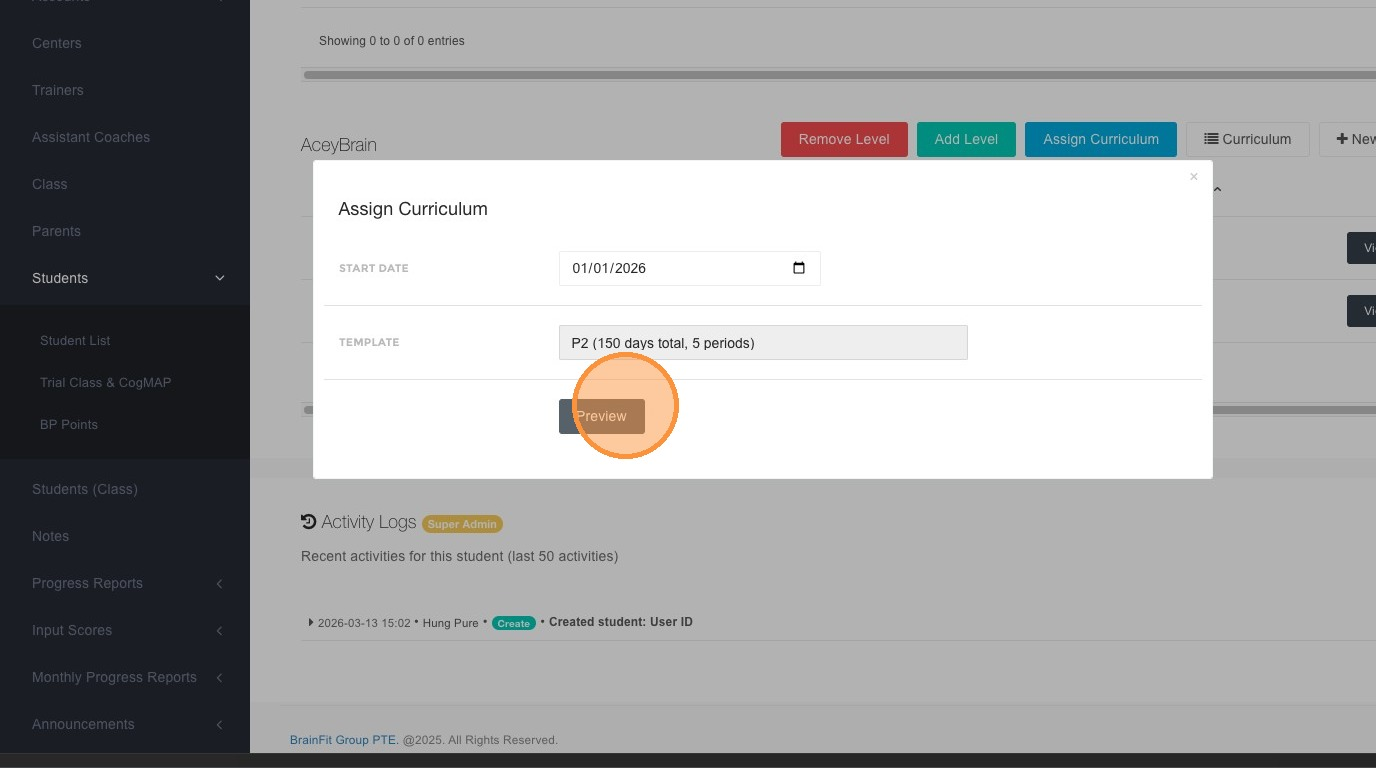
Click Preview to review assignment
-
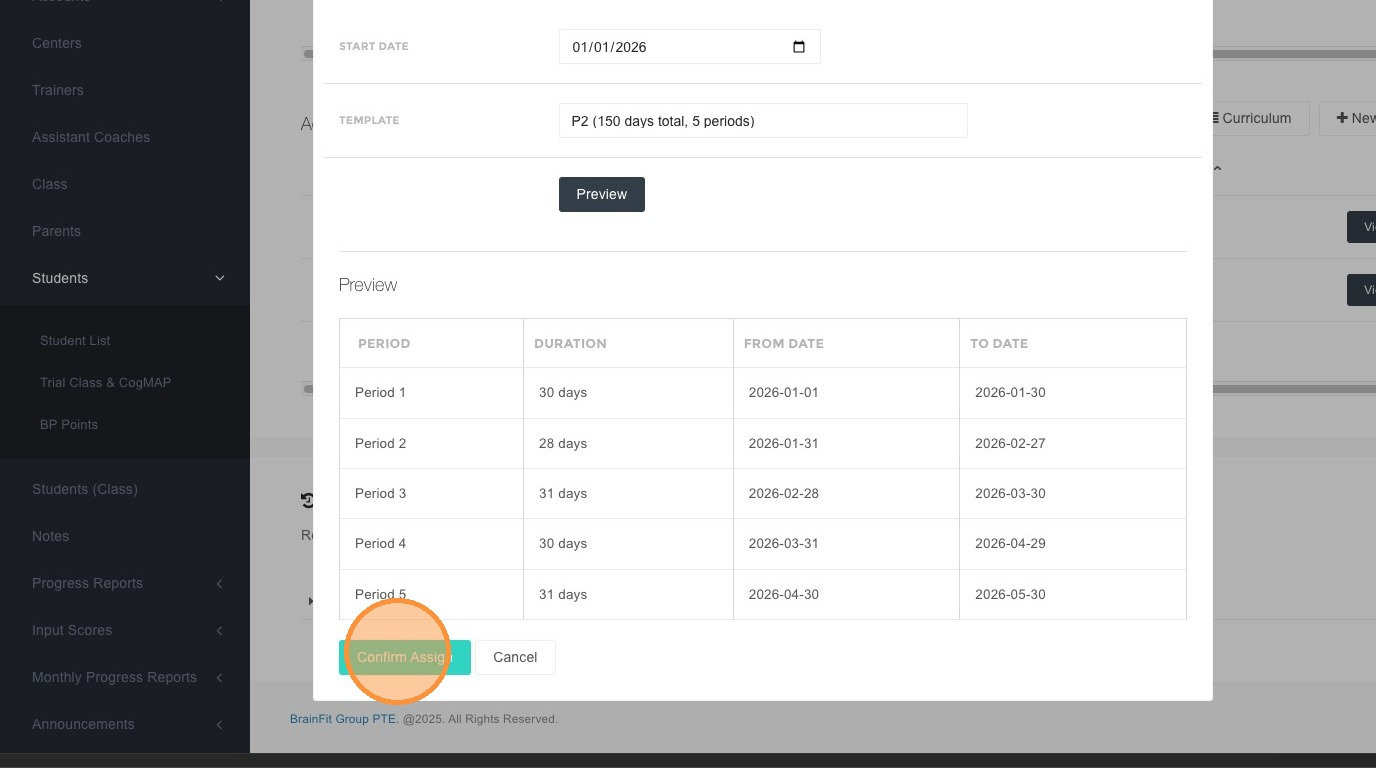
Click Confirm Assign
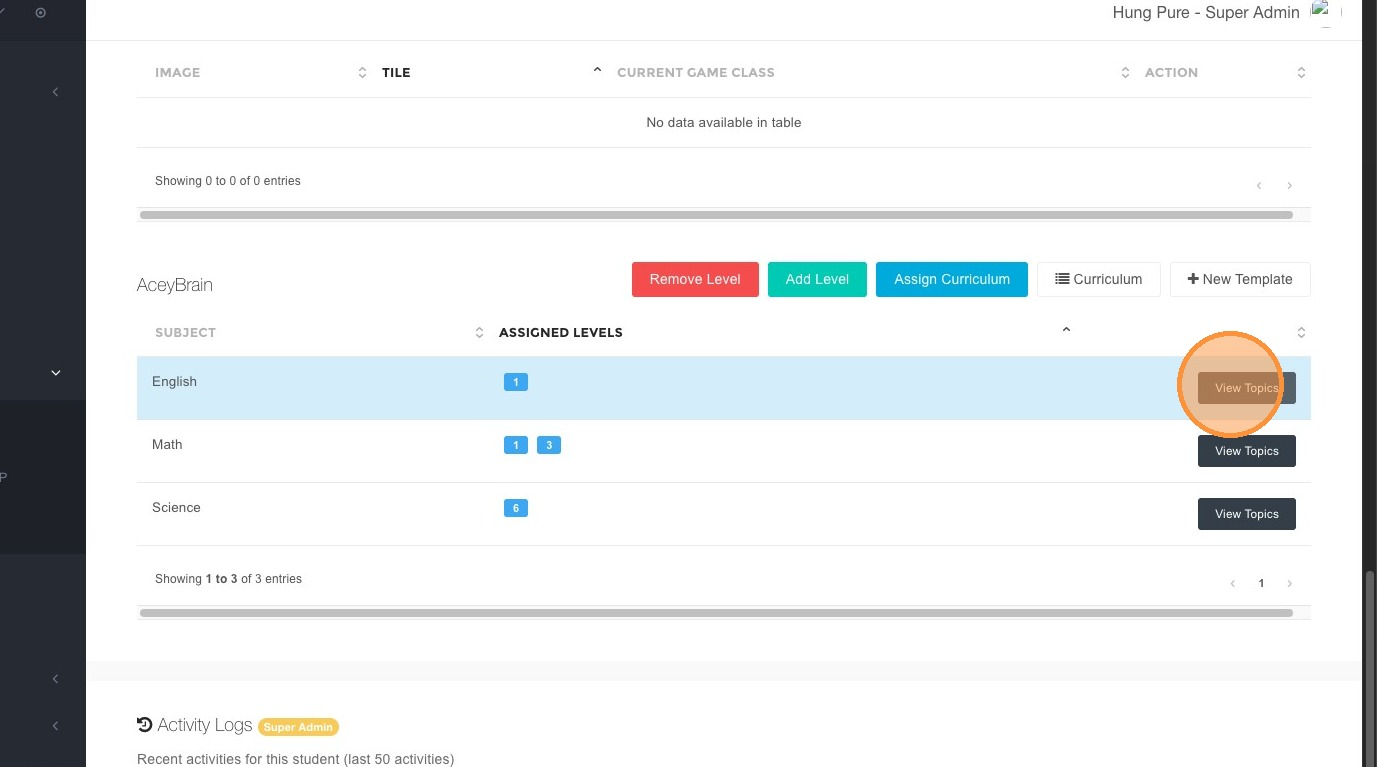
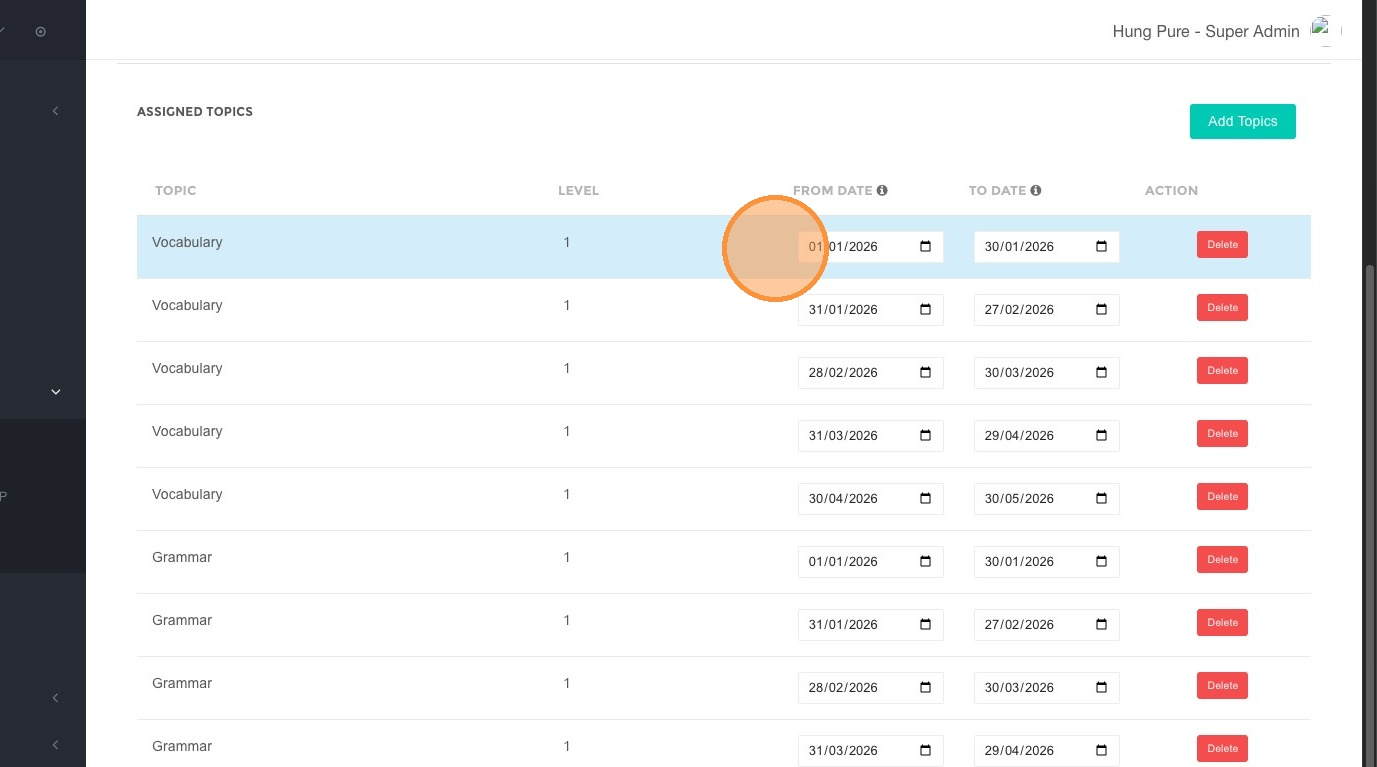
Step 4: Verify Assignment
-
Click View Topics
-
Validate:
- Assigned topics
- Start and end dates
📌 Note:
- The system automatically distributes topics based on the selected template duration.
- You can manually add more topics later to strengthen specific skills for the student.
5. Best Practices
- Use consistent naming convention for templates (e.g.
Grade - Duration) - Prefer All Topics when applying full curriculum coverage
- Always Preview before confirming assignment
- Review assigned topics to ensure alignment with student learning goals